
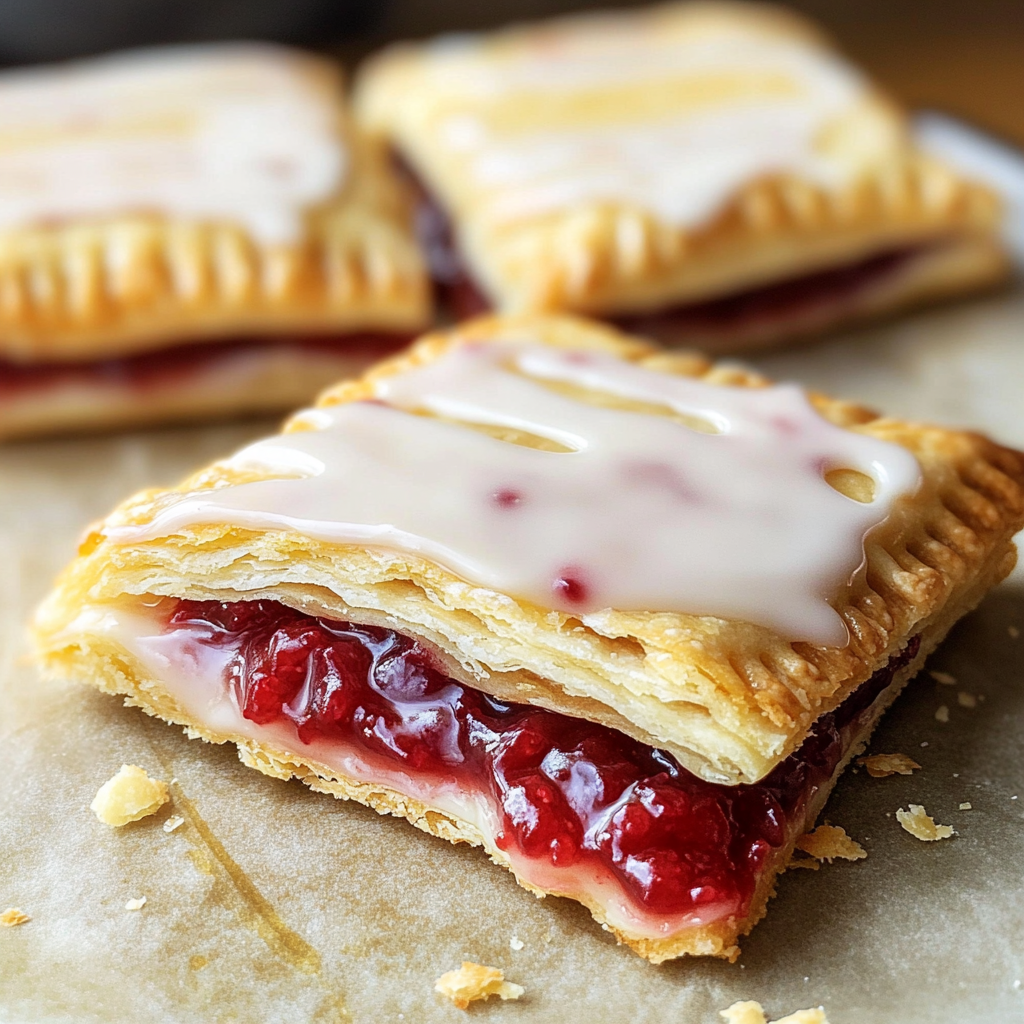
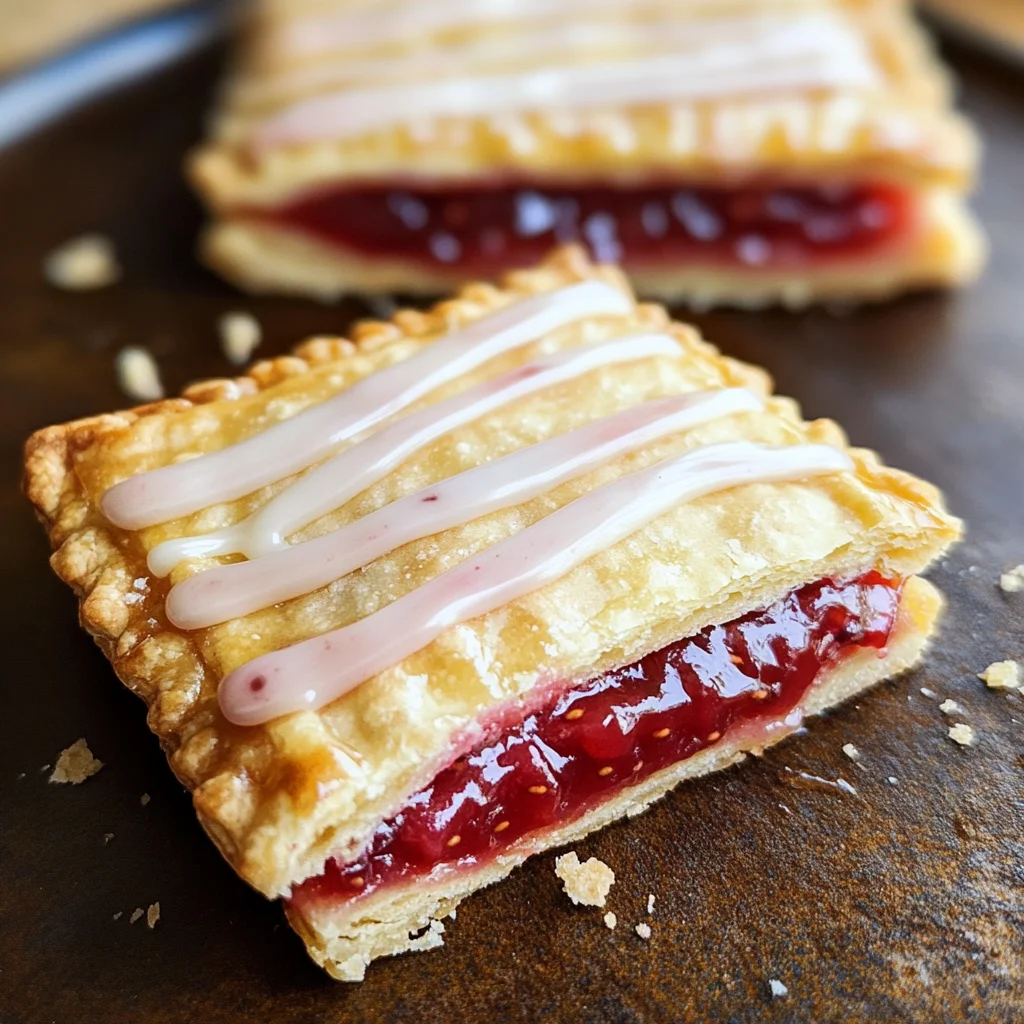
Homemade gluten-free pop tarts are a delightful treat that perfectly combines a classic flaky pastry with a sweet strawberry jam filling, finished off with a luscious vanilla glaze. These pastries are not only perfect for breakfast but also make an excellent dessert or snack for any occasion. With their buttery texture and nostalgic flavor, they bring joy to both kids and adults alike.
Why You’ll Love This Recipe
- Easy to Make – The simple steps ensure that anyone can create these pastries in their own kitchen.
- Deliciously Sweet – The combination of strawberry jam and vanilla glaze results in a mouthwatering flavor that’s hard to resist.
- Versatile Options – You can customize the filling to suit your taste, whether it be raspberry, blueberry, or even chocolate spread.
- Gluten-Free Friendly – Enjoy the classic pop tart experience without gluten, making it suitable for those with dietary restrictions.
- Perfect for Any Occasion – These pastries are ideal for breakfast, lunchboxes, or as a tasty dessert at gatherings.
Tools and Preparation
Before you start making your homemade gluten-free pop tarts, gather all the necessary tools. Having everything on hand will streamline the process and ensure success.
Essential Tools and Equipment
- Rolling pin
- Baking sheet
- Parchment paper
- Mixing bowls
- Pastry brush
Importance of Each Tool
- Rolling pin – A good rolling pin helps achieve an even thickness for the pastry dough, ensuring consistent baking.
- Baking sheet – A sturdy baking sheet provides an even surface for your pop tarts to bake perfectly without sticking.
- Parchment paper – Using parchment paper prevents sticking and makes cleanup a breeze.
- Mixing bowls – Having different sizes of mixing bowls allows for easy mixing and preparation of ingredients.
Ingredients
Homemade gluten-free pop tarts feature a classic flaky pastry filled with sweet strawberry jam and topped with a vanilla glaze. Each bite is buttery, tender, sweet, and nostalgic.
For the Dough
- 2 3/4 cup gluten-free all-purpose rice flour blend with xanthan gum
- 1/4 cup granulated sugar
- 1/2 teaspoon salt
- 1/2 cup very cold unsalted butter (dairy-free use Smart Balance butter)
- 1/2 cup very cold shortening
- 2 large eggs
- 1/2 teaspoon apple cider vinegar
- 6 tablespoons ice cold water
For the Filling
- 16 teaspoon gluten-free seedless strawberry jam
For the Glaze
- 1 large egg
- 1 tablespoon water
- 1 cup powdered sugar
- 1/4 teaspoon pure vanilla extract
- 2 tablespoons water
How to Make Gluten-Free Pop Tarts
Step 1: Prepare the Dough
- In a large mixing bowl, combine the gluten-free flour blend, granulated sugar, and salt.
- Cut in the cold butter and shortening until the mixture resembles coarse crumbs.
- In another bowl, whisk together the eggs, apple cider vinegar, and ice-cold water.
- Gradually add this mixture to the dry ingredients until combined. Form into a ball and refrigerate for 30 minutes.
Step 2: Roll Out the Dough
- Preheat your oven to 375°F (190°C).
- On a floured surface (use additional gluten-free flour), roll out half of the chilled dough into a rectangle about 1/8-inch thick.
- Cut into rectangles measuring about 3 x 4 inches.
Step 3: Assemble the Pop Tarts
- Place about 2 teaspoons of strawberry jam onto half of each rectangle.
- Top with another dough rectangle and seal edges using a fork or by pressing down with your fingers.
Step 4: Bake
- Place assembled pop tarts on a parchment-lined baking sheet.
- Beat one egg with water; brush over each pastry for shine.
- Bake in preheated oven for about 20 minutes or until golden brown.
Step 5: Make the Glaze
- In a small bowl, mix powdered sugar with vanilla extract and enough water to achieve desired consistency.
- Drizzle over cooled pop tarts before serving.
Enjoy your homemade gluten-free pop tarts!
How to Serve Gluten-Free Pop Tarts
Gluten-free pop tarts are a delightful treat that can be enjoyed in various ways. Whether for breakfast, dessert, or a snack, here are some serving suggestions to elevate your experience.
With Fresh Fruits
- Strawberries: Sliced fresh strawberries add a fruity freshness that complements the sweet filling.
- Bananas: Thinly sliced bananas provide a creamy texture and natural sweetness.
Alongside Whipped Cream
- Homemade Whipped Cream: Lighten up your pop tarts with a dollop of homemade whipped cream for a rich and creamy finish.
- Coconut Whipped Cream: A dairy-free alternative that adds a subtle coconut flavor and lightness.
Pairing with Coffee or Tea
- Hot Coffee: Enjoy your pop tarts with a warm cup of coffee for a perfect breakfast combo.
- Herbal Tea: A soothing herbal tea balances the sweetness of the pop tarts nicely.
On Ice Cream
- Vanilla Ice Cream: Serve warm gluten-free pop tarts over vanilla ice cream for an indulgent dessert.
- Dairy-Free Ice Cream: For a dairy-free option, consider coconut or almond-based ice creams to complement the flavors.
How to Perfect Gluten-Free Pop Tarts
Perfecting gluten-free pop tarts takes practice, but these simple tips can help you achieve the best results.
- Chill Your Ingredients: Keeping butter and shortening very cold ensures a flaky crust.
- Don’t Overwork the Dough: Mix until just combined to avoid tough pastry; this keeps your pop tarts tender.
- Use Quality Jam: Opt for high-quality gluten-free jam for an authentic flavor and sweetness in every bite.
- Egg Wash is Key: Brushing the tops with an egg wash before baking gives them a beautiful golden color.
- Adjust Baking Time: Keep an eye on them while baking; ovens vary, and you want them lightly golden.
Best Side Dishes for Gluten-Free Pop Tarts
Serving gluten-free pop tarts can be even more enjoyable with the right side dishes. Here’s a list of great options to consider.
- Fresh Fruit Salad: A mix of seasonal fruits adds brightness and freshness to balance the sweetness of pop tarts.
- Yogurt Parfait: Layer yogurt with granola and berries for a satisfying side that provides protein and crunch.
- Smoothie Bowl: A refreshing smoothie bowl topped with seeds and nuts pairs well with the sweet flavors of the pop tart.
- Trail Mix: A crunchy trail mix made from nuts and dried fruits offers contrasting textures alongside your treat.
- Oven-Baked Hash Browns: Crispy hash browns create a savory counterpart that complements sweet pastries beautifully.
- Nut Butter Dip: Serve almond or peanut butter as a dip for an added layer of richness that’s delightful with every bite.
Common Mistakes to Avoid
Making homemade gluten-free pop tarts can be simple, but there are a few common mistakes that can ruin the experience. Here are some to watch out for:
- Using the wrong flour blend: Not all gluten-free flours behave the same way. Make sure to use a blend that includes xanthan gum for better texture.
- Skipping the chill time: If you don’t chill your dough, it will be difficult to work with and won’t hold its shape when baked. Always refrigerate before rolling out.
- Overfilling with jam: While it’s tempting to add extra filling, overstuffing can cause the pop tarts to burst while baking. Stick to the recommended amount for best results.
- Not sealing edges properly: Failing to seal the edges securely may lead to leaks during baking. Use a fork or your fingers to crimp them well.
- Ignoring baking times: Each oven is different; monitor your pop tarts closely during baking. Remove them when they’re golden brown for the perfect texture.
Storage & Reheating Instructions
Refrigerator Storage
- Store in an airtight container.
- Keep in the refrigerator for up to 5 days.
Freezing Gluten-Free Pop Tarts
- Wrap each pop tart tightly in plastic wrap or aluminum foil.
- Place in a freezer-safe bag or container and freeze for up to 3 months.
Reheating Gluten-Free Pop Tarts
- Oven: Preheat your oven to 350°F (175°C). Place pop tarts on a baking sheet and heat for about 10 minutes, until warm.
- Microwave: Heat one pop tart at a time on a microwave-safe plate for about 20-30 seconds. Adjust time based on wattage.
- Stovetop: Warm in a skillet over low heat for about 2-3 minutes per side until heated through.
Frequently Asked Questions
Here are answers to some common questions about gluten-free pop tarts.
How do I make Gluten-Free Pop Tarts?
To make gluten-free pop tarts, combine gluten-free flour with sugar, salt, butter, and eggs. Roll out the dough, fill with jam, and bake until golden brown.
Can I use other flavors of jam in gluten-free pop tarts?
Absolutely! You can customize your gluten-free pop tarts with any flavor of jam or fruit preserves that you enjoy.
Are gluten-free pop tarts dairy-free?
Yes! By using dairy-free butter alternatives like Smart Balance, you can easily make these pop tarts dairy-free too.
How long do gluten-free pop tarts last?
Stored properly in an airtight container, gluten-free pop tarts can last up to 5 days in the refrigerator or 3 months in the freezer.
Final Thoughts
These homemade gluten-free pop tarts are not only delicious but also incredibly versatile. With their flaky pastry and sweet filling, they bring back nostalgic flavors while being adaptable to your taste preferences. Feel free to experiment with different jams or toppings! Enjoy making this delightful treat!

Gluten-Free Pop Tarts
Homemade gluten-free pop tarts are a delightful fusion of flaky pastry and sweet strawberry jam, making them a perfect treat for breakfast, dessert, or a snack. These pastries are easy to make and can be customized with your favorite fillings, whether you prefer raspberry, blueberry, or chocolate spread. With their buttery texture and nostalgic flavor, they are sure to bring joy to both kids and adults alike. Topped with a luscious vanilla glaze, these pastries not only taste great but also look appealing. Enjoy this simple recipe that allows you to indulge in a classic favorite while adhering to gluten-free guidelines.
- Total Time: 50 minutes
- Yield: Makes approximately 8 pop tarts 1x
Ingredients
- 2 3/4 cup gluten-free all-purpose rice flour blend with xanthan gum
- 1/4 cup granulated sugar
- 1/2 teaspoon salt
- 1/2 cup very cold unsalted butter (or dairy-free alternative)
- 1/2 cup very cold shortening
- 2 large eggs
- 1/2 teaspoon apple cider vinegar
- 6 tablespoons ice cold water
- 16 teaspoon gluten-free seedless strawberry jam
- 1 large egg (for glaze)
- 1 tablespoon water (for glaze)
- 1 cup powdered sugar (for glaze)
- 1/4 teaspoon pure vanilla extract (for glaze)
- 2 tablespoons water (for glaze)
Instructions
- In a large bowl, mix the gluten-free flour blend, granulated sugar, and salt. Cut in the cold butter and shortening until crumbly.
- Whisk together eggs, apple cider vinegar, and ice water in another bowl. Add to the dry ingredients and combine until form a ball. Refrigerate for 30 minutes.
- Preheat oven to 375°F (190°C). Roll out dough on a floured surface into 1/8-inch thick rectangles.
- Place about 2 teaspoons of strawberry jam on half of each rectangle. Top with another rectangle and seal edges.
- Bake for about 20 minutes or until golden brown. Prepare the glaze by mixing powdered sugar with vanilla extract and enough water to reach desired consistency; drizzle over cooled pastries.
- Prep Time: 30 minutes
- Cook Time: 20 minutes
- Category: Dessert
- Method: Baking
- Cuisine: American
Nutrition
- Serving Size: 1 serving
- Calories: 220
- Sugar: 10g
- Sodium: 150mg
- Fat: 10g
- Saturated Fat: 4g
- Unsaturated Fat: 6g
- Trans Fat: 0g
- Carbohydrates: 31g
- Fiber: 1g
- Protein: 2g
- Cholesterol: 35mg
Leave a Comment