
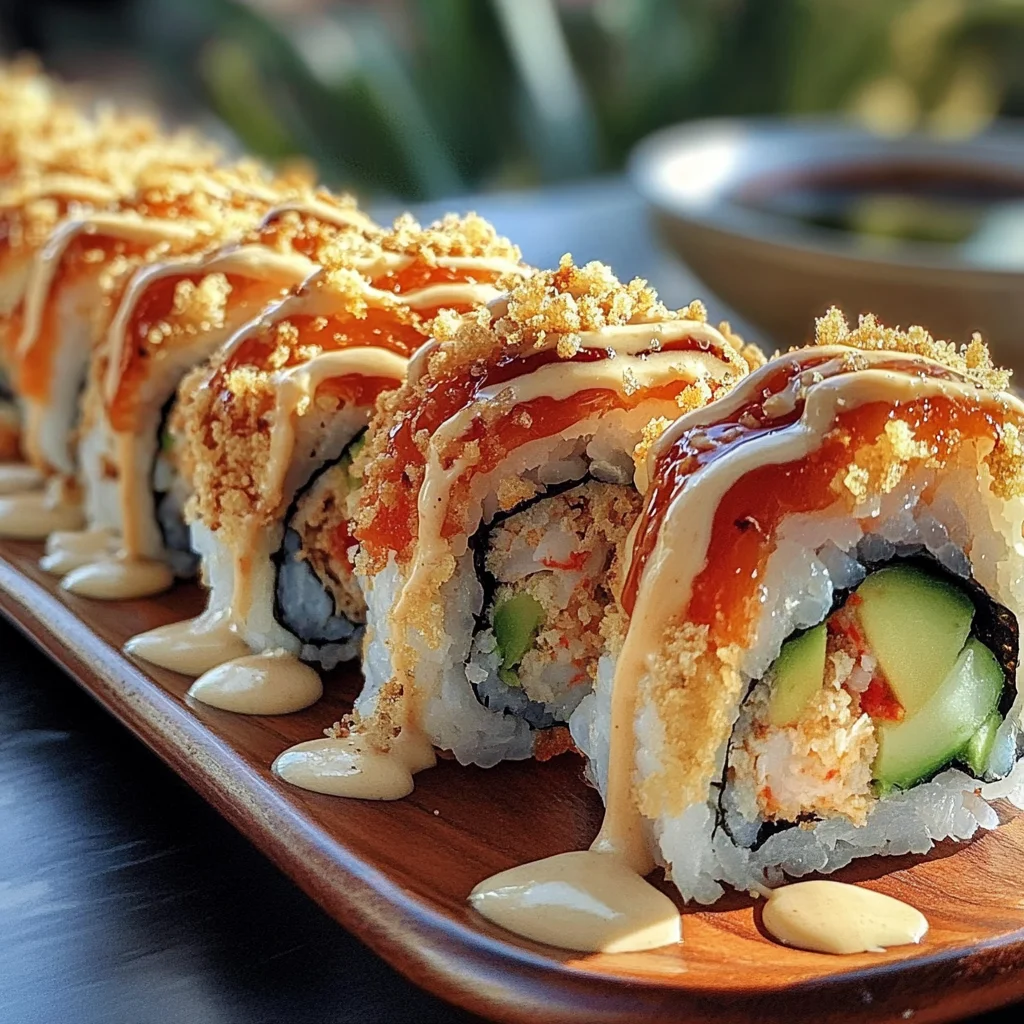
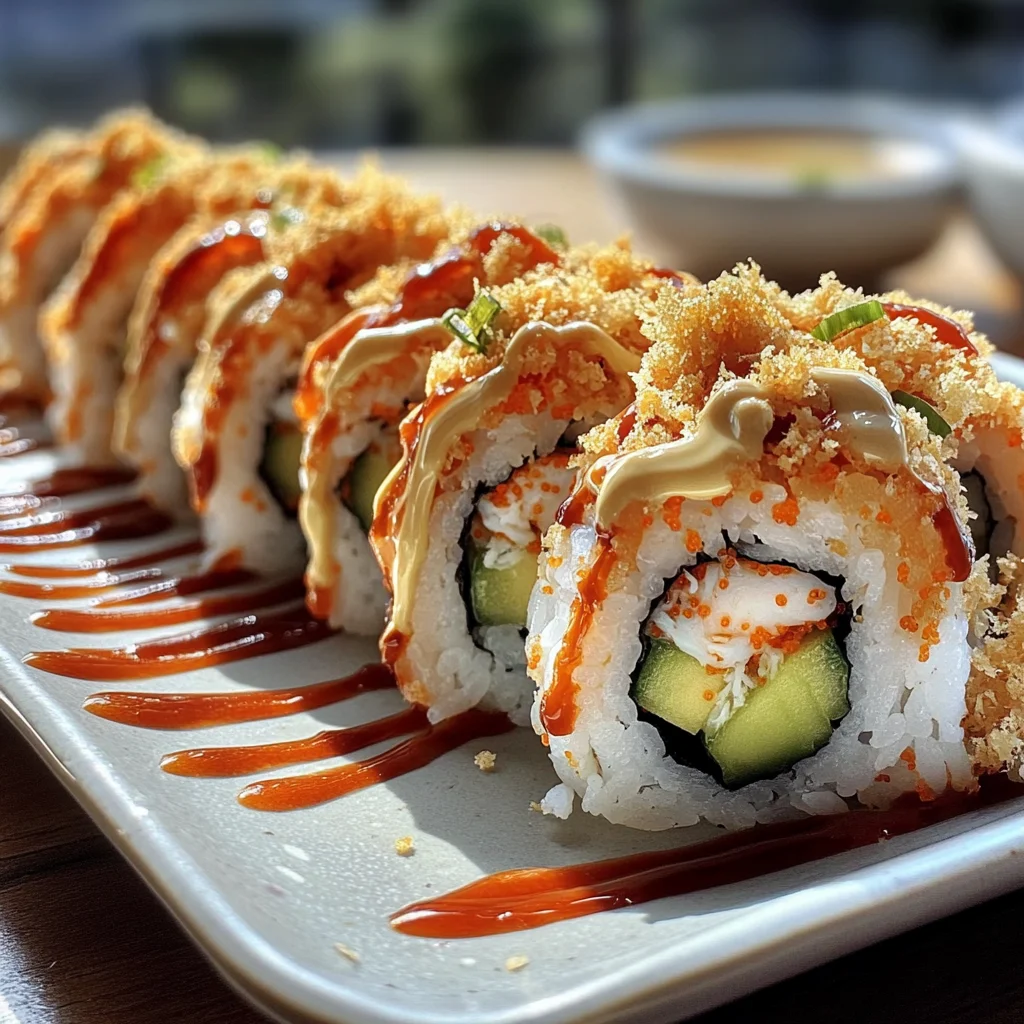
Homemade California Crunch Roll Sushi – The Best Crunchy Roll Guide is a delightful twist on the classic California roll! This unique sushi combines creamy avocado, crisp cucumber, and sweet crab, all wrapped in sushi rice and nori. Topped with spicy mayo, eel sauce, and a crunchy layer of panko or fried onions, it’s perfect for sushi night at home or any special occasion.
Why You’ll Love This Recipe
- Easy to Make – With simple steps and minimal ingredients, you can create sushi at home without any fuss.
- Flavorful Combination – The mix of creamy avocado, sweet crab, and crispy toppings delivers a satisfying taste experience.
- Customizable – You can add or swap ingredients based on your preferences—experiment with different vegetables or proteins!
- Perfect for Sharing – This recipe makes enough servings for a small gathering, making it ideal for parties or family nights.
- Fun Activity – Making sushi at home is a fun and interactive way to spend time with friends or family.
Tools and Preparation
To make your Homemade California Crunch Roll Sushi successfully, you’ll need some essential tools. Having the right equipment will make the rolling process easier and more enjoyable.
Essential Tools and Equipment
- Bamboo sushi mat
- Rice cooker or pot
- Sharp knife
- Mixing bowl
Importance of Each Tool
- Bamboo sushi mat – This tool helps you roll the sushi tightly and evenly, ensuring a perfect shape.
- Rice cooker or pot – A rice cooker simplifies cooking the rice to the right texture; alternatively, a pot works well if you prefer stovetop cooking.
- Sharp knife – A sharp knife ensures clean cuts when slicing your rolls, which is crucial for presentation.
Ingredients
A crunchy twist on the classic California roll! This Homemade California Crunch Roll Sushi combines creamy avocado, crisp cucumber, and sweet crab wrapped in sushi rice and nori, then topped with spicy mayo, eel sauce, and golden crispy panko or fried onions. Perfect for sushi night at home.
For the Sushi Rice
- 1 cup short-grain white rice
- 1¼ cups water
- 2 tbsp rice vinegar
- 1 tbsp sugar
- ½ tsp salt
For the Filling
- 4 roasted nori sheets (sushi-grade)
- 1 cup imitation crab (or real crab meat)
- 1 ripe avocado, sliced
- 1 small cucumber, cut into thin strips
For the Toppings
- 2 tbsp spicy mayo (mayo + sriracha)
- 1 tbsp eel sauce
- ½ cup toasted panko breadcrumbs or French fried onions
- Cream cheese strips (optional)
- Thinly sliced jalapeño (optional)
- Teriyaki glaze (for drizzling)
How to Make Homemade California Crunch Roll Sushi – The Best Crunchy Roll Guide
Step 1: Prepare the Rice
Rinse the rice under cold water until it runs clear. Cook it with water in a rice cooker or on the stovetop until tender. In a saucepan, mix together vinegar, sugar, and salt until dissolved. Gently fold this mixture into warm rice and let it cool.
Step 2: Set Up Your Rolling Station
Wrap your bamboo sushi mat in plastic wrap to keep it clean. Place a bowl of water mixed with rice vinegar nearby; this will help prevent sticking while you roll.
Step 3: Assemble the Roll
Lay a sheet of nori shiny side down on your bamboo mat. Spread an even layer of cooled sushi rice over the nori while leaving about ½ inch at the top edge. Flip the nori so that the rice is facing down. Layer your crab meat, avocado slices, cucumber strips, and any optional add-ins across the center.
Step 4: Roll the Sushi
With your thumbs under the edge of the bamboo mat and fingers holding down fillings, lift the edge of the mat to start rolling tightly into a cylinder. Seal the edge by wetting it slightly with water from your bowl. Use your mat to press gently but firmly into shape.
Step 5: Add the Crunch
Brush the top of your rolled sushi with spicy mayo or eel sauce. Generously sprinkle toasted panko or fried onions over it. Lightly press down with your mat to secure these toppings.
Step 6: Slice and Serve
Using a sharp damp knife, slice your roll into 8 pieces carefully. Drizzle extra sauce if desired before serving alongside soy sauce, pickled ginger, and wasabi for an authentic experience.
How to Serve Homemade California Crunch Roll Sushi – The Best Crunchy Roll Guide
Serving your Homemade California Crunch Roll Sushi can turn a simple meal into a delightful experience. Here are some creative ways to present and enjoy this crunchy sushi roll.
Platter Presentation
- Arrange the sushi rolls on a large platter for a colorful display.
- Garnish with thinly sliced lime or lemon for an extra pop of color.
Dipping Sauces
- Serve with soy sauce, which adds a savory touch.
- Include optional spicy mayo and eel sauce for added flavor.
Accompaniments
- Pair with pickled ginger to cleanse the palate between bites.
- Add wasabi for those who enjoy a bit of heat.
Sushi-Themed Party
- Create a sushi bar where guests can assemble their rolls.
- Provide a variety of toppings and fillings for customization.
How to Perfect Homemade California Crunch Roll Sushi – The Best Crunchy Roll Guide
Perfecting your Homemade California Crunch Roll Sushi is all about technique and fresh ingredients. Follow these tips to elevate your sushi-making skills.
- Use Fresh Ingredients: Always choose ripe avocados and fresh crab meat for the best flavor.
- Proper Rice Preparation: Rinse rice thoroughly until the water runs clear to achieve the right texture.
- Don’t Overfill: Keep your fillings moderate; overfilling can make rolling difficult and messy.
- Sharp Knife for Slicing: Use a sharp, damp knife to slice rolls cleanly without squashing them.
- Experiment with Toppings: Try different toppings like toasted sesame seeds or sliced scallions for variety.
- Let it Rest: Allow the rolled sushi to sit for a few minutes before slicing; this helps maintain its shape.
Best Side Dishes for Homemade California Crunch Roll Sushi – The Best Crunchy Roll Guide
Complement your Homemade California Crunch Roll Sushi with these delicious side dishes. Each option enhances the overall meal experience.
- Edamame: Lightly salted steamed edamame makes for a healthy appetizer that pairs well with sushi.
- Seaweed Salad: A refreshing seaweed salad adds a crunchy texture and complements the flavors of sushi.
- Miso Soup: Warm miso soup serves as a comforting option that balances the meal perfectly.
- Cucumber Salad: This light salad, dressed in rice vinegar, offers a crisp contrast to the rich flavors of sushi.
- Tempura Vegetables: Crispy tempura vegetables add crunch and are an excellent addition alongside sushi rolls.
- Fruit Platter: Serve seasonal fruits like mango or watermelon for a sweet finish after your meal.
Common Mistakes to Avoid
Making sushi at home can be fun, but there are common pitfalls that can affect your Homemade California Crunch Roll Sushi. Here’s what to watch out for:
- Incorrect Rice Preparation: Not rinsing the rice can lead to a gummy texture. Always rinse until the water runs clear for the best results.
- Overfilling the Roll: Adding too many ingredients makes it hard to roll tightly. Stick to smaller quantities of fillings for an easier roll.
- Using Dried-Out Nori: Stale nori sheets won’t stick well. Store them properly and use fresh sheets for better flavor and texture.
- Cutting with a Dull Knife: Using a blunt knife can squash the roll. Use a sharp, damp knife to get clean slices without damaging your sushi.
- Skipping the Cooling Step: Not allowing the rice to cool before rolling can cause condensation and sogginess. Let it cool gently for optimal texture.
Storage & Reheating Instructions
Refrigerator Storage
- Store leftover rolls in an airtight container.
- Consume within 24 hours for the best taste and texture.
Freezing Homemade California Crunch Roll Sushi – The Best Crunchy Roll Guide
- Wrap each roll tightly in plastic wrap before placing them in a freezer-safe bag.
- Freeze for up to 2 months; however, texture may change upon thawing.
Reheating Homemade California Crunch Roll Sushi – The Best Crunchy Roll Guide
- Oven: Preheat to 350°F (175°C). Wrap in foil and heat for about 10 minutes until warm.
- Microwave: Place on a microwave-safe plate, cover with a damp paper towel, and heat for 30 seconds intervals until warmed through.
- Stovetop: Heat in a non-stick pan over low heat, turning occasionally until warmed evenly.
Frequently Asked Questions
Here are some common questions about making Homemade California Crunch Roll Sushi:
What Can I Use Instead of Crab?
You can use imitation crab or real crab meat as shown in the recipe. Alternatively, consider using cooked shrimp or even tofu for a vegetarian option.
How Do I Make Spicy Mayo?
Mix equal parts mayonnaise and Sriracha until you reach your desired spice level. Adjust according to your preference!
Can I Customize My Sushi Fillings?
Absolutely! Feel free to add or substitute ingredients like avocado, cucumber, or even thinly sliced bell peppers based on your liking.
How Can I Make My Rolls Crispy?
For added crunch, top your rolls with toasted panko breadcrumbs or French fried onions after brushing with spicy mayo or eel sauce.
What Is The Best Way To Serve Sushi?
Serve your sushi with soy sauce, pickled ginger, and wasabi on the side for dipping. You might also drizzle some teriyaki glaze for extra flavor.
Final Thoughts
Homemade California Crunch Roll Sushi is not only delicious but also versatile! You can customize it with various ingredients to suit your taste. Perfect for sushi night at home or as an impressive dish at gatherings, this crunchy roll will surely delight everyone who tries it. Enjoy experimenting with different flavors!

Homemade California Crunch Roll Sushi
Homemade California Crunch Roll Sushi is a delightful twist on the classic sushi roll, perfect for sushi enthusiasts and newcomers alike. This easy-to-follow recipe features creamy avocado, crisp cucumber, and sweet crab wrapped in tender sushi rice and nori. Topped with spicy mayo, rich eel sauce, and a crunchy layer of panko breadcrumbs or fried onions, it’s an impressive dish for any occasion or a fun sushi night at home. Customizable to suit your taste preferences, this crunchy roll will become a favorite among family and friends.
- Total Time: 50 minutes
- Yield: Approximately 4 servings 1x
Ingredients
- 1 cup short-grain white rice
- 1¼ cups water
- 2 tbsp rice vinegar
- 1 tbsp sugar
- ½ tsp salt
- 4 roasted nori sheets
- 1 cup imitation crab or real crab meat
- 1 ripe avocado, sliced
- 1 small cucumber, cut into thin strips
- 2 tbsp spicy mayo (mayo + sriracha)
- 1 tbsp eel sauce
- ½ cup toasted panko breadcrumbs or French fried onions
Instructions
- Rinse the rice under cold water until it runs clear. Cook it with water in a rice cooker or on the stovetop until tender. In a saucepan, mix together vinegar, sugar, and salt until dissolved. Gently fold this mixture into warm rice and let it cool.
- Wrap your bamboo sushi mat in plastic wrap to keep it clean. Place a bowl of water mixed with rice vinegar nearby; this will help prevent sticking while you roll.
- Lay a sheet of nori shiny side down on your bamboo mat. Spread an even layer of cooled sushi rice over the nori while leaving about ½ inch at the top edge. Flip the nori so that the rice is facing down. Layer your crab meat, avocado slices, cucumber strips, and any optional add-ins across the center.
- With your thumbs under the edge of the bamboo mat and fingers holding down fillings, lift the edge of the mat to start rolling tightly into a cylinder. Seal the edge by wetting it slightly with water from your bowl. Use your mat to press gently but firmly into shape.
- Brush the top of your rolled sushi with spicy mayo or eel sauce. Generously sprinkle toasted panko or fried onions over it. Lightly press down with your mat to secure these toppings.
- Using a sharp damp knife, slice your roll into 8 pieces carefully. Drizzle extra sauce if desired before serving alongside soy sauce, pickled ginger, and wasabi for an authentic experience.
- Prep Time: 30 minutes
- Cook Time: 20 minutes
- Category: Main
- Method: Rolling
- Cuisine: Japanese
Nutrition
- Serving Size: 1 roll (150g)
- Calories: 350
- Sugar: 2g
- Sodium: 450mg
- Fat: 12g
- Saturated Fat: 2g
- Unsaturated Fat: 8g
- Trans Fat: 0g
- Carbohydrates: 53g
- Fiber: 4g
- Protein: 10g
- Cholesterol: 25mg


Leave a Comment