
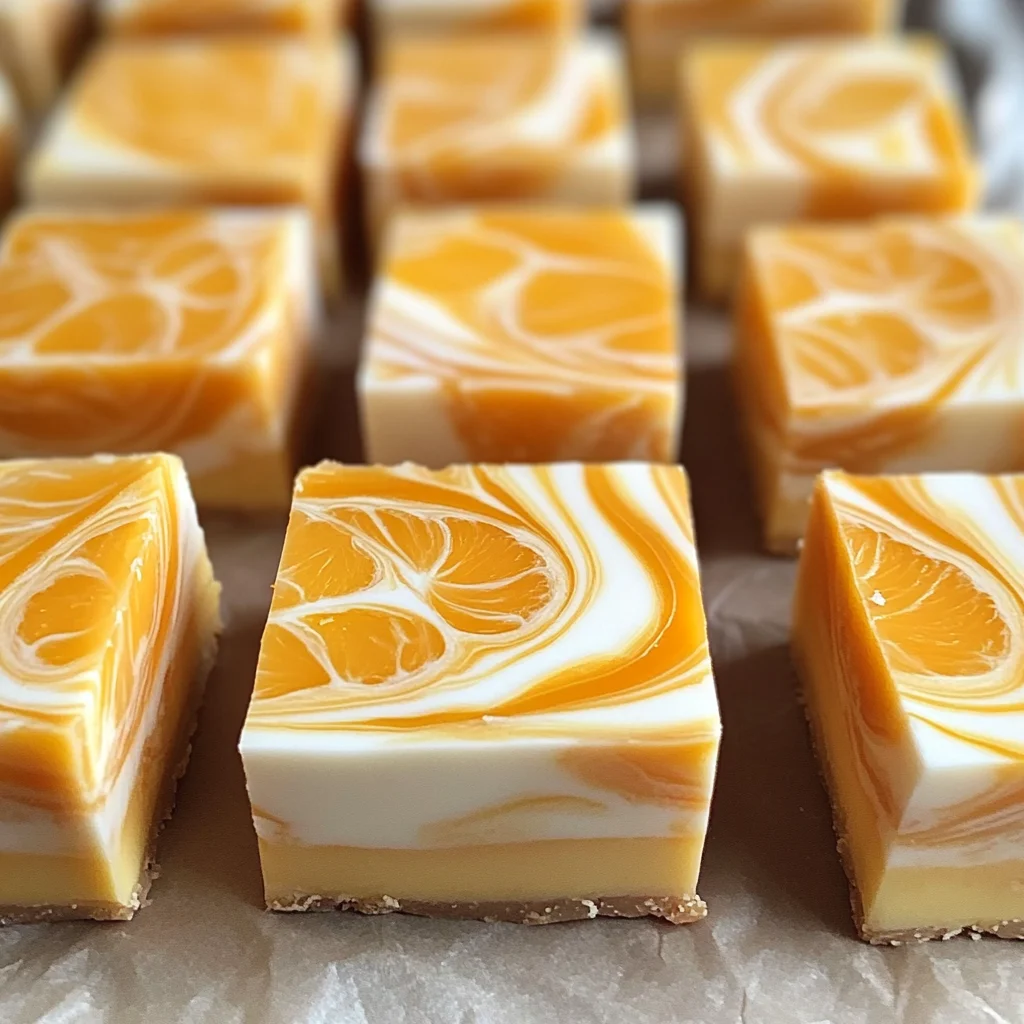
Creamy and delightful, Orange Dreamsicle Fudge is the perfect treat for any occasion. This sweet confection offers a unique blend of smooth white chocolate and zesty orange flavors that evoke memories of sunny days. Whether you’re celebrating a special event or simply indulging in a tasty snack, this fudge stands out with its vibrant colors and rich taste. It’s easy to make, making it an ideal choice for both novice cooks and experienced bakers alike.
Why You’ll Love This Recipe
- Deliciously Unique Flavor: The combination of white chocolate and orange creates an irresistible taste that is both refreshing and comforting.
- Simple Preparation: With straightforward steps, this recipe makes it easy to whip up a batch of fudge in no time.
- Perfect for Sharing: Cut into squares, this fudge is great for parties, gatherings, or as thoughtful gifts for friends and family.
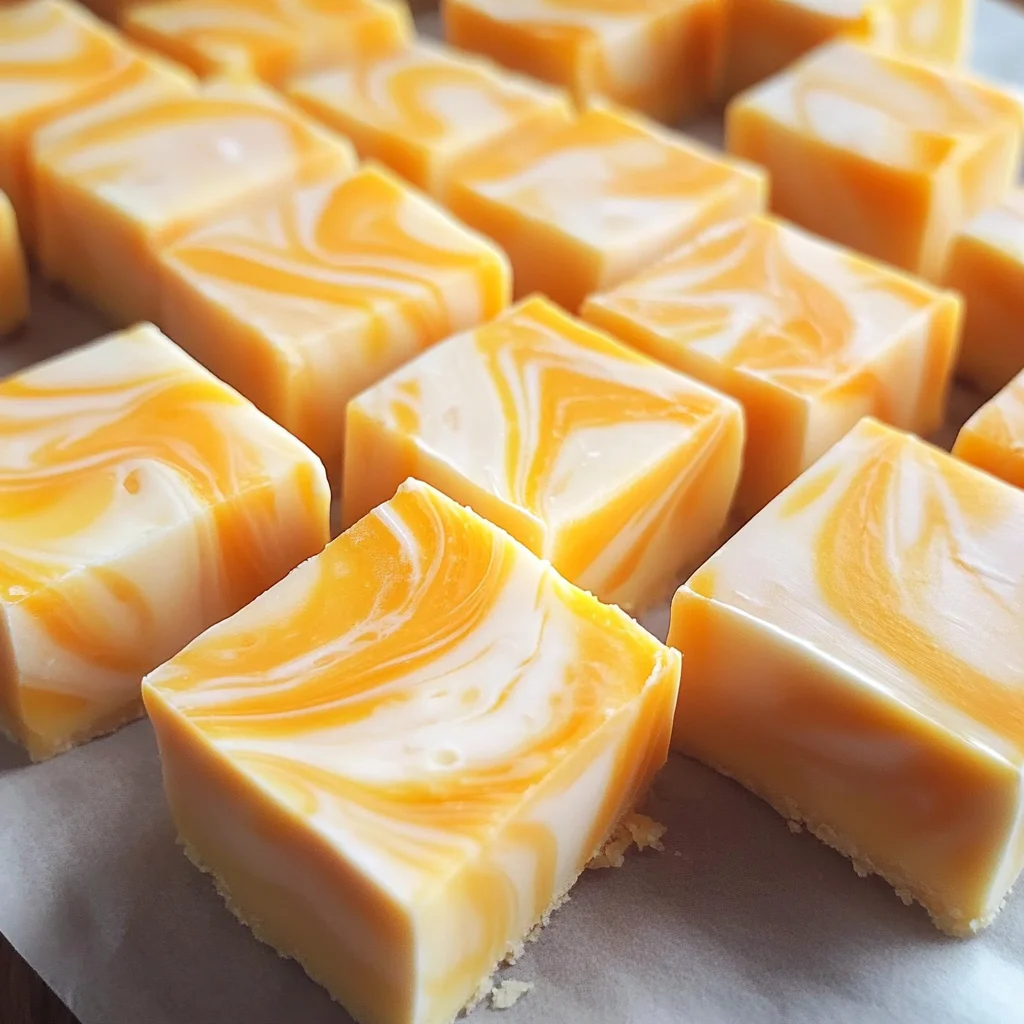
- Customizable Colors: Use food coloring to create visually appealing swirls that can match any occasion or holiday theme.
- Versatile Treat: Enjoy it as a dessert on its own or use it as a topping for ice cream or cupcakes.
Tools and Preparation
Before diving into the delicious world of Orange Dreamsicle Fudge, gather your tools to ensure a smooth process. Having everything ready will make your cooking experience enjoyable.
Essential Tools and Equipment
- Baking pan (9×13 inches)
- Parchment paper
- Saucepan
- Mixing bowls
- Butter knife
- Cooking thermometer
Importance of Each Tool
- Baking pan: A 9×13 inch pan is essential for creating the perfect thickness of fudge.
- Saucepan: This allows you to melt ingredients evenly without burning them.
- Cooking thermometer: Ensures your mixture reaches the right temperature for optimal texture.
Ingredients
For the Fudge Base
- 2/3 c. heavy cream
- 3 c. granulated sugar
- 3/4 c. unsalted butter
- 7 oz. vegan marshmallows cream
- 2 c. white chocolate chips
For Flavoring
- 3 teaspoons orange extract
- Orange food coloring (up to 10 drops, based on preference)
How to Make Orange Dreamsicle Fudge
Step 1: Prepare the Baking Pan
Start by greasing a baking pan that measures 9×13 inches and lining it with parchment paper, ensuring all sides are covered.
Step 2: Combine Ingredients in Saucepan
In a saucepan, combine unsalted butter, heavy cream, and granulated sugar. Stir the mixture until the butter melts completely and everything is well blended.
Step 3: Cook the Mixture
Continue cooking the mixture until it reaches 235°F, known as the softball stage. Stir for about 3 minutes after reaching this temperature.
Step 4: Add Marshmallows and Chocolate
Remove the saucepan from heat. Quickly stir in vegan marshmallows cream and white chocolate chips. Mix until the mixture becomes smooth and creamy.
Step 5: Color the Mixtures
Transfer about 1 cup of this mixture into a bowl. To the remaining mixture in the pan, add orange extract along with up to 10 drops of orange food coloring. Mix thoroughly until you achieve your desired hue.
Step 6: Pour into Pan
Pour the orange mixture into the prepared pan, ensuring it spreads evenly across all areas.
Step 7: Create Marble Effect
Drop dollops of the remaining white mixture on top of the orange one. Use a butter knife to swirl both mixtures together, creating an appealing marble effect.
Step 8: Chill Until Set
Place the pan in the refrigerator for about 2 hours until the fudge sets properly.
Step 9: Cut and Serve
Finally, cut into squares. Savor this delightful combination of flavors and textures!
How to Serve Orange Dreamsicle Fudge
Orange Dreamsicle Fudge is a delightful treat that can be enjoyed in various ways. Whether you’re hosting a gathering or simply treating yourself, these serving suggestions will enhance your fudge experience.
Individual Servings
- Serve each piece of fudge on small dessert plates for an elegant presentation.
- Pair with a dollop of whipped cream for added richness and texture.
With Fresh Fruit
- Add slices of fresh oranges or berries to complement the orange flavor and add a refreshing touch.
- Consider skewering pieces of fudge and fruit on a stick for fun party bites.
Ice Cream Sundae Style
- Crumble the fudge over vanilla or orange sorbet for a delicious sundae.
- Drizzle with chocolate syrup or caramel sauce to elevate the flavors.
Gift Packaging
- Wrap pieces of fudge in decorative cellophane bags as personalized gifts.
- Include a handwritten note with serving suggestions for your recipients.
Coffee or Tea Pairing
- Serve alongside a warm cup of coffee or herbal tea to balance the sweetness.
- A citrus-flavored tea can further enhance the orange notes in the fudge.
How to Perfect Orange Dreamsicle Fudge
To make sure your Orange Dreamsicle Fudge turns out perfectly every time, follow these helpful tips.
- Use Fresh Ingredients: Freshly squeezed orange juice can elevate the flavor profile, making it more vibrant.
- Monitor Temperature Closely: Ensure you reach 235°F for the perfect texture; using a candy thermometer is recommended.
- Stir Gently: When mixing in the white chocolate and marshmallow cream, stir slowly to avoid air bubbles that can affect smoothness.
- Chill Properly: Allow adequate time in the refrigerator to ensure proper setting; this will help achieve clean cuts when slicing.
- Customize Colors: Feel free to adjust the amount of food coloring based on your preference for vibrancy; start with just a few drops and mix until satisfied.
Best Side Dishes for Orange Dreamsicle Fudge
To round out your dessert table, consider pairing your Orange Dreamsicle Fudge with these delightful side dishes. Each option complements the sweet, citrusy flavors perfectly.
- Citrus Salad: A light salad made with mixed greens and segments of oranges and grapefruits drizzled with honey dressing.
- Pineapple Sorbet: A refreshing pineapple sorbet provides a tropical twist that pairs wonderfully with creamy fudge.
- Vanilla Ice Cream: Classic vanilla ice cream serves as a rich base that enhances the creamy texture of the fudge.
- Chocolate-Covered Strawberries: These treats offer a nice contrast between rich chocolate and bright fruit flavors.
- Lemon Meringue Tart: The tartness cuts through sweetness, offering a delightful balance after indulging in fudge.
- Fruit Platter: An array of seasonal fruits like kiwi, mango, and strawberries can brighten up any dessert table while complementing the fudge’s flavors.
Common Mistakes to Avoid
Making Orange Dreamsicle Fudge can be a delightful experience, but it’s easy to make mistakes. Here are some common pitfalls to watch out for.
- Skipping the thermometer: Not using a candy thermometer can lead to fudge that is too soft or too hard. Always measure the temperature accurately until it reaches 235°F.
- Overmixing: Stirring the mixture too much after adding white chocolate chips can cause it to become grainy. Mix just until smooth for the best texture.
- Not lining the pan: Forgetting to line your pan with parchment paper can result in a sticky mess. Make sure to line it well for easy removal of the fudge.
- Ignoring cooling time: Cutting into the fudge before it has set properly can ruin its consistency. Allow it to chill in the refrigerator for at least 2 hours.
- Underestimating flavor strength: Adding too much orange extract can overpower the fudge. Start with less and adjust based on your taste preference.
Refrigerator Storage
- Store Orange Dreamsicle Fudge in an airtight container.
- It will keep well in the refrigerator for about 1-2 weeks.
Freezing Orange Dreamsicle Fudge
- Wrap individual pieces in plastic wrap, then place them in a freezer-safe container.
- The fudge can be frozen for up to 3 months.
Reheating Orange Dreamsicle Fudge
- Oven: Preheat to 350°F and heat for about 5 minutes, just until softened.
- Microwave: Warm in 10-second intervals until it’s slightly soft; be careful not to melt completely.
- Stovetop: Place in a saucepan over low heat, stirring gently until softened.
Frequently Asked Questions
What is Orange Dreamsicle Fudge?
Orange Dreamsicle Fudge is a creamy dessert that combines white chocolate with orange flavor, creating a delightful sweet treat reminiscent of orange creamsicles.
How do I customize my Orange Dreamsicle Fudge?
You can add nuts, dried fruits, or different types of food coloring to create unique variations on this classic recipe!
Can I use dairy-free alternatives?
Yes! Substitute heavy cream with coconut cream and ensure your white chocolate chips are dairy-free for a vegan-friendly version.
Is Orange Dreamsicle Fudge suitable for parties?
Absolutely! This fudge is perfect for gatherings and makes a great addition to dessert tables or as party favors.
Final Thoughts
Our Orange Dreamsicle Fudge is not only delicious but also easy to make. Its vibrant flavor and creamy texture make it a crowd-pleaser. Feel free to customize it with your favorite mix-ins or colors, ensuring every batch is uniquely yours!

Orange Dreamsicle Fudge
Indulge in the delightful taste of Orange Dreamsicle Fudge, a creamy treat that captures the essence of summer with its refreshing orange flavor and smooth white chocolate base. This easy-to-make confection will remind you of childhood days spent enjoying frozen creamsicles on warm afternoons. Perfect for any occasion, whether you’re hosting a gathering or simply treating yourself, this fudge is visually appealing with its vibrant colors and marbled effect. Share it with friends and family or package it as thoughtful gifts—everyone will love this sweet addition to their dessert repertoire!
- Total Time: 25 minutes
- Yield: Approximately 24 servings 1x
Ingredients
- 2/3 cup heavy cream
- 3 cups granulated sugar
- 3/4 cup unsalted butter
- 7 oz vegan marshmallow cream
- 2 cups white chocolate chips
- 3 teaspoons orange extract
- Orange food coloring (to preference)
Instructions
- Grease a 9×13 baking pan and line it with parchment paper.
- In a saucepan, combine heavy cream, unsalted butter, and granulated sugar. Stir until melted and well blended.
- Cook the mixture until it reaches 235°F (softball stage), stirring for about 3 minutes after reaching temperature.
- Remove from heat and quickly stir in vegan marshmallow cream and white chocolate chips until smooth.
- Separate about 1 cup of the mixture into a bowl. Add orange extract and food coloring to the remaining mixture in the pan; mix thoroughly.
- Pour the orange mixture into the prepared pan, then dollop the reserved white mixture on top. Use a butter knife to swirl together.
- Chill in the refrigerator for about 2 hours until set.
- Cut into squares and enjoy!
- Prep Time: 15 minutes
- Cook Time: 10 minutes
- Category: Dessert
- Method: Baking
- Cuisine: American
Nutrition
- Serving Size: 1 square (approximately 30g)
- Calories: 130
- Sugar: 18g
- Sodium: 15mg
- Fat: 6g
- Saturated Fat: 3g
- Unsaturated Fat: 2g
- Trans Fat: 0g
- Carbohydrates: 19g
- Fiber: <1g
- Protein: <1g
- Cholesterol: 10mg
Leave a Comment